Deactivating and Moving HL7+ Installations
If you wish to permanently delete the installation see Deleting HL7+ Installations.
(YouTube) Moving a HL7+ Client Installation
![]() Important Tip: Don't delete your LIVE HL7+ Installations unless you are absolutely sure that you won't need them at another client site in the future. You've paid an activation fee for the installation and you have already paid for the installation through the end of your current subscription period so keep it and reuse it. Review all of your installations every year BEFORE you renew your HL7+ subscription and THEN delete any unassigned live installations that you're sure you don't need so that you don't have to pay for the additional year when you renew.
Important Tip: Don't delete your LIVE HL7+ Installations unless you are absolutely sure that you won't need them at another client site in the future. You've paid an activation fee for the installation and you have already paid for the installation through the end of your current subscription period so keep it and reuse it. Review all of your installations every year BEFORE you renew your HL7+ subscription and THEN delete any unassigned live installations that you're sure you don't need so that you don't have to pay for the additional year when you renew.
All HL7+ users WILL have the need at some point to move a HL7+ Client Installation from one computer/server to another at some point. The more installations that you have, the more often this need will arise. Hardware gets old, contracts expire, accidents happen, it's a fact of life. There is a proper way to make this happen under the HL7+ license agreement.
What you must not do is just arbitrarily copy/clone/image a HL7+ Client Installation on one computer over to another computer.
How to do it - Best Practices
This method only works if you still have access to the OLD computer. If it has been destroyed or taken completely out of service go to #2.
In the HL7+ Client Console do the following.
1.Make sure that ALL of the HL7+ component features are STOPPED, and any of them which use MS Windows Services (HL7+ Listener, HL7+ Router, HL7+ SQL Schema Engine, HL7+ Postmaster) have REMOVED their MS Windows Services from the computer. 2.In the HL7+ Client Console click Deactivate This Installation from the Tools menu.
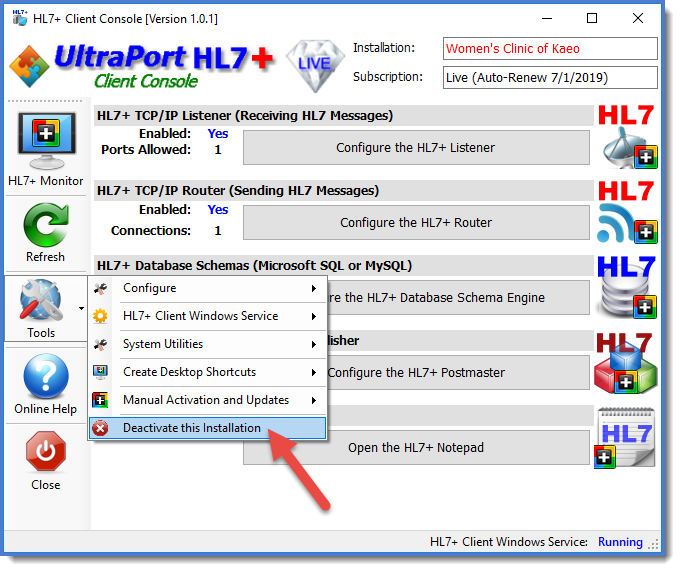 Dectivating the Installation from the HL7+ Client Console
If the client console is working properly then all you have to do next is Refresh your data in the Management Console and you'll see the installation has been moved to Unassigned. IF the client computer is NOT internet functional then you will need to get the Purge Data file left on the client computer and deliver it to a computer running the Management Console to complete a manual deactivation (see computers with no internet).
Finally, you can always contact customer service 24/7 for assistance in doing this.
|
Method #1 is always preferred, but you can also deactivate an installation from the Management Console in most cases without requiring an intervention from customer service to help. It's important to remember that IF you deactivate a client installation from the Management Console that it is immediate and cannot be undone. This means that the client installation will just arbitrarliy STOP working when the update is received there.
To deactivate a client from the Management Console just click the
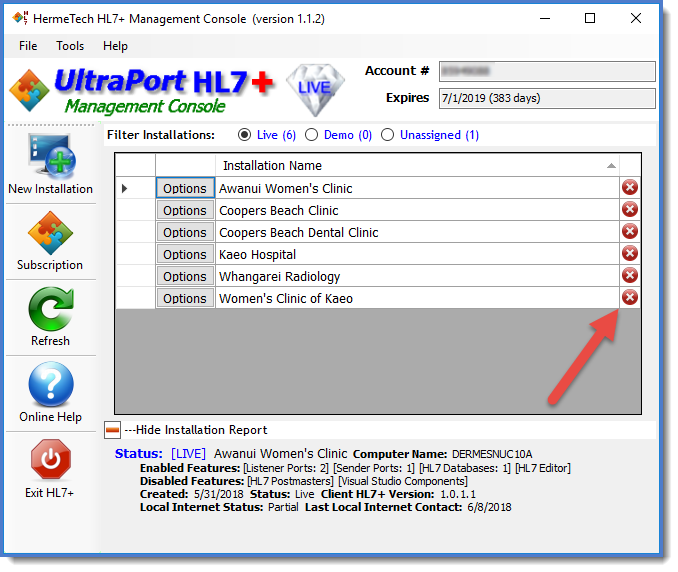 Deactivate From the Management Console
Clicking the
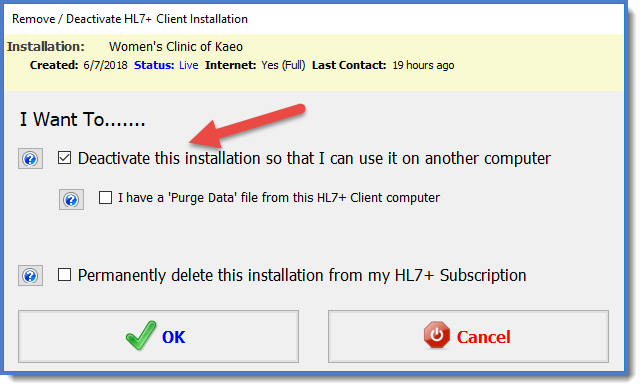 Check the 'Deactivate' box
Check the Deactivate this installation box and then click OK. You will then be presented with a short confirmation questionnaire which you must complete.
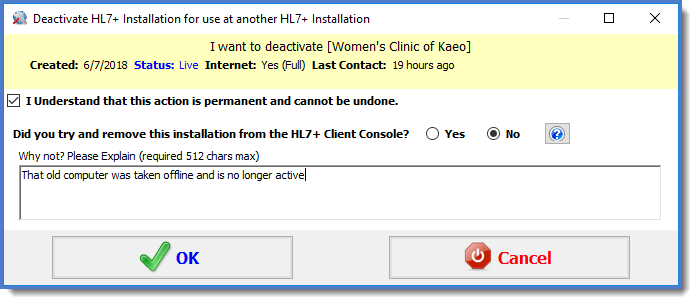 Questionnaire / Confirmation
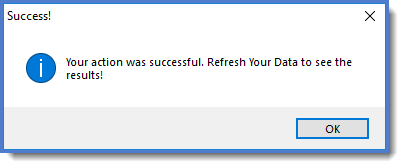
Fill out the required fields and click OK. If there is some reason why the installation cannot be deactivated you will be informed, otherwise the software will perform an internet action and deactivate the installation. and you will see a success confirmation.
Finally. Your data will be refreshed, and you will then see the installation has been reverted to Unassigned.
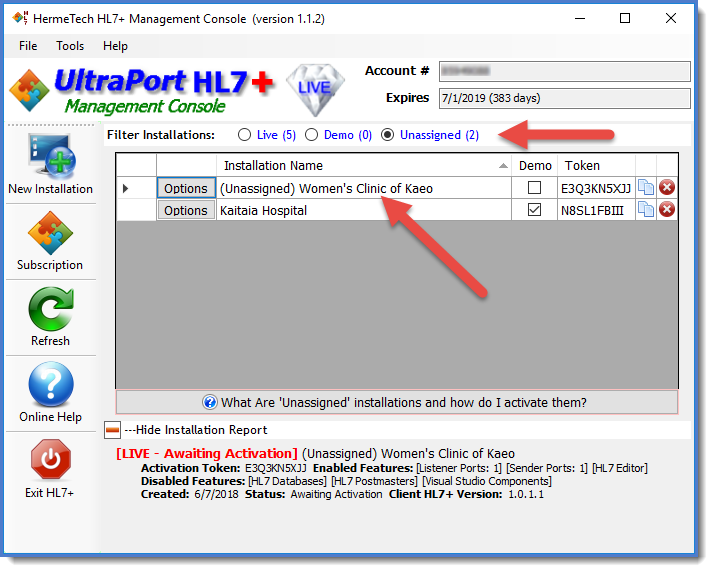 Newly 'Unassigned' Installation Available Again for Assignment
IMPORTANT: You will note that the installation name now has the word (Unassigned) next to it. Your first order of business with this newly available installation will be to rename it and remove the "(Unassigned)"
Remember that you can always contact customer service 24/7 for assistance with this.
|

