Editing a HL7+ Installation
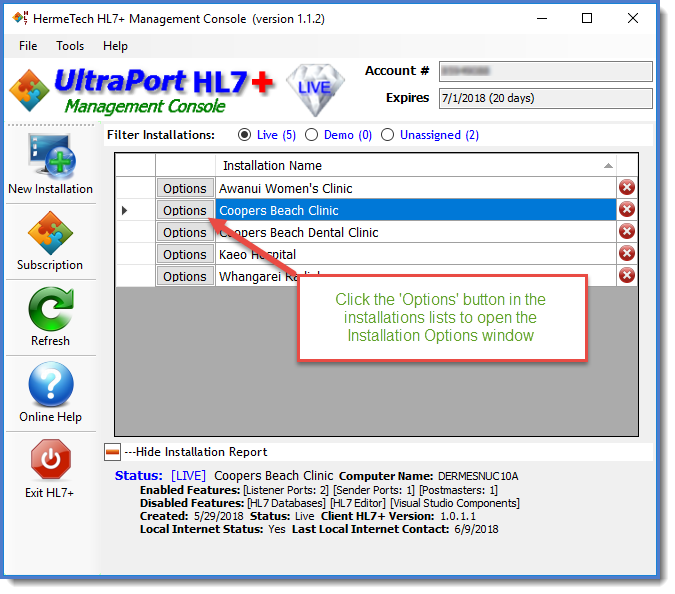
 Click Options to open Installation Options Window |
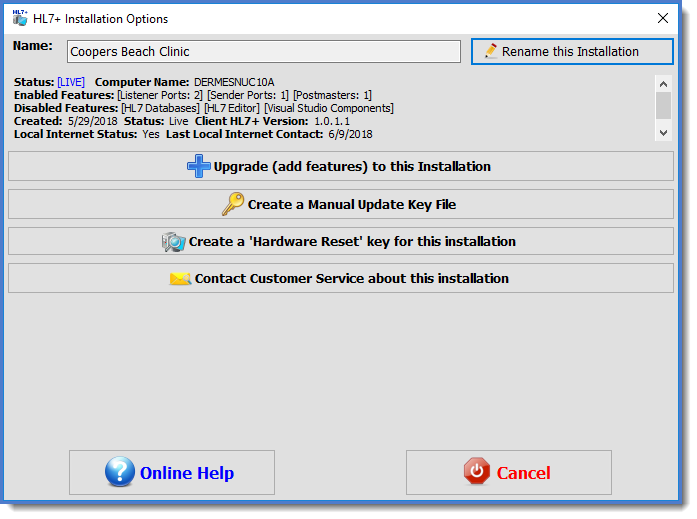
 Installation Options Window |
When you open the Installation Options window you might see different options available to you depending on whether you are editing an active installation or one that is unassigned. The options you might see are:
![]() Click this button to give your installation a different name.
Click this button to give your installation a different name.
![]() Click this button to add or remove HL7+ features from an installation. See Upgrading Installations.
Click this button to add or remove HL7+ features from an installation. See Upgrading Installations.
![]() Click this button if you have received a Manual Update Request file from a HL7+ Client (see Installations with No Internet).
Click this button if you have received a Manual Update Request file from a HL7+ Client (see Installations with No Internet).
![]() Click this button if you need to create a Hardware Reset Key for the installation. See below for more information about Hardware Reset Keys.
Click this button if you need to create a Hardware Reset Key for the installation. See below for more information about Hardware Reset Keys.
![]() Click this button to create a direct email about the selected installation to HermeTech Customer Service.
Click this button to create a direct email about the selected installation to HermeTech Customer Service.
What is a "Hardware Reset" Key?
There are some instances where a HL7+ client installation may be prompted for and need you to provide them with a Hardware Reset Key. The key is basically a simple rotating password which can be used to ensure that certain actions being taken on the client computer are being done with your knowledge and approval without requiring you to provide them with your HL7+/HermeTech log-on credentials. Below are a couple of examples of when a HL7+ client installation will require a Hardware Reset Key.
EXAMPLE 1: Deactivating the HL7+ Installation from within the HL7+ Client Console software (with local internet access). If possible, this is always the preferred method you should use to deactivate a HL7+ client installation. When deactivated in the Client Console software it will ensure that all of the relevant HL7+ MS Windows services are properly removed from the system registry etc. Once this is done all you have to do in your HL7+ Management Console is Refresh your data and you will see the installation has been completely deactivated and is ready for reassignment to another computer.
EXAMPLE 2: Deactivating the HL7+ Installation from within the HL7+ Client Console software (without local internet access). HL7+ Client installations which do not have local internet access will require a Hardware Reset Key to manually purge the local installation and create a file called HL7Plus.Purgedata.dat which will be left in the Client Console installation folder. This file will need to be delivered to you on this computer so that you can use it to deactivate that client installation in your HL7+ subscription.
EXAMPLE 3: Copy Protection. Each HL7+™ installation may only be deployed to a single physical or virtual computer. If the HL7+™ Client software from one installation is replicated/copied/imaged to a different computer without going through the proper procedure for moving an HL7+™ Client installation to a different computer it is not only a serious breach of your license/service agreement it can also result in corruption which can render one or both installations inoperative. As part of the internal efforts to prevent this every HL7+™ Client installation maintains an internal hash of the computer hardware on which it is installed. If a significant hardware change is detected that installation can be rendered temporarily inoperative and the end user will be presented with a message in their HL7+™ Client Console software to contact you to obtain a 10 character Hardware Reset key which they will need in order to Refresh their data and resume functionality.
