HL7+ Installations with No Internet
Using HL7+ when the installation cannot communicate with our web services will require substantially more effort so if at all possible we advise you to work with your clients to allow the HL7+ Client Console software through their firewall/proxies. IF this is absolutely not an option then you will have to manually activate, update, and renew these installations to insure that they keep working. Example, if your HL7+ subscription expires on August 15th 2018 and you renew it for another year on August 10 2018, then all internet functional installations will automatically receive that renewal information and just keep working. Installations with no internet however will STOP functioning on August 15th UNLESS you apply a manual update.
So, for installations with no internet you will need to be able to perform 2 basic tasks.
Manual activation is a 3 step process.
1.In the HL7+ Client Console you will create a Manual Activation Request file and deliver it to a computer running the HL7+ Management Console 2.In the Management Console you will use that file in the Installation Options window to create a Manual Activation Key file and deliver that file back to the client. 3.In the Client Console you will use the Activation Key File to activate the installation.
STEP 1. Creating the Manual Activation Request
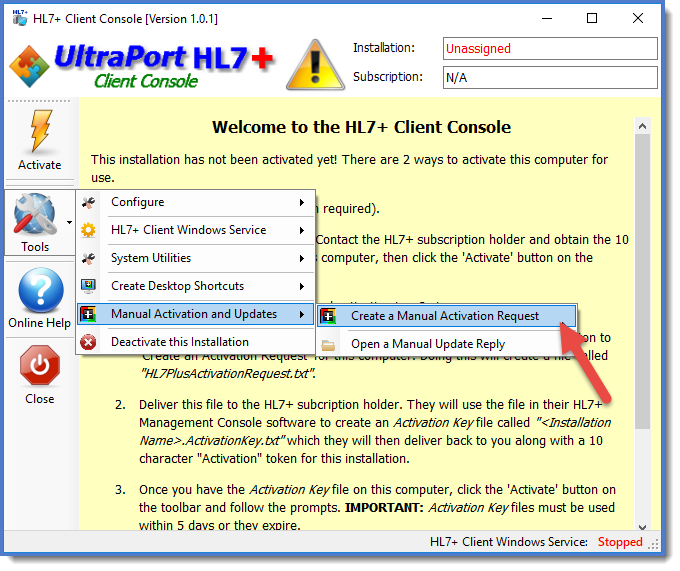 Creating a Manual Activation Request
In the Client Console software click the Tools button and in the Manual Activation and Updates menu click Create a Manual Activation Request. You will be prompted to select the folder and it will create a file called HL7PlusActivationRequest.txt. Deliver this file to a computer running the Management Console software.
STEP 2. Creating the Manual Activation Key File
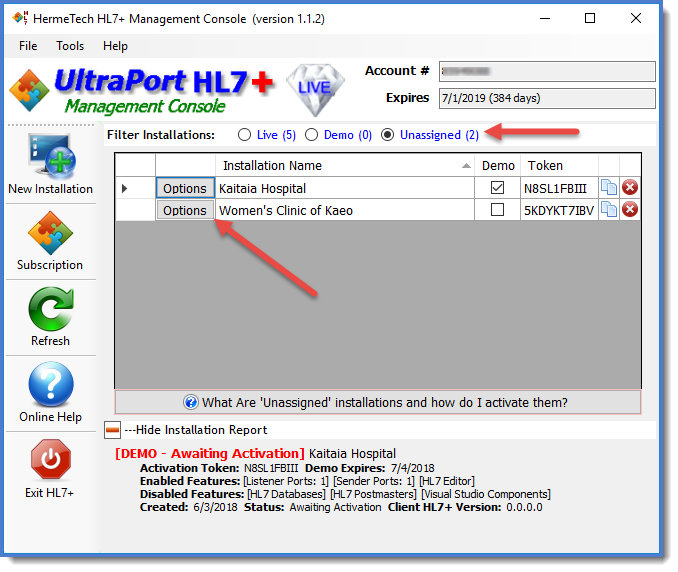
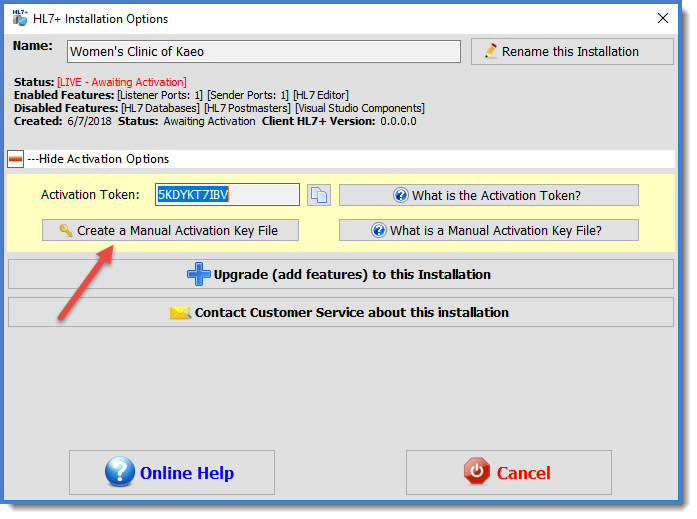
In the Management Console (installations view) click the Options button for the Unassigned installation you wish to activate. You will be prompted to open the file (HL7PlusActivationRequest.txt) created in Step 1. It will then ask you to confirm that you wish to activate it and then it will create a file called <installation name>.ActivationKey.txt. Note that for <installation name> it will remove all punctuation from the installation name and replace spaces with _, so the file from the screenshot would be named Womens_Clinic_of_Kaeo.ActivationKey.txt.
You must now deliver that key file back to the client computer for Step 3.
STEP 3. Activating the Installation
Once you have delivered the activation key file to the client computer, start the HL7+ Client Console software and click the Activate button on the toolbar to open the activation window.
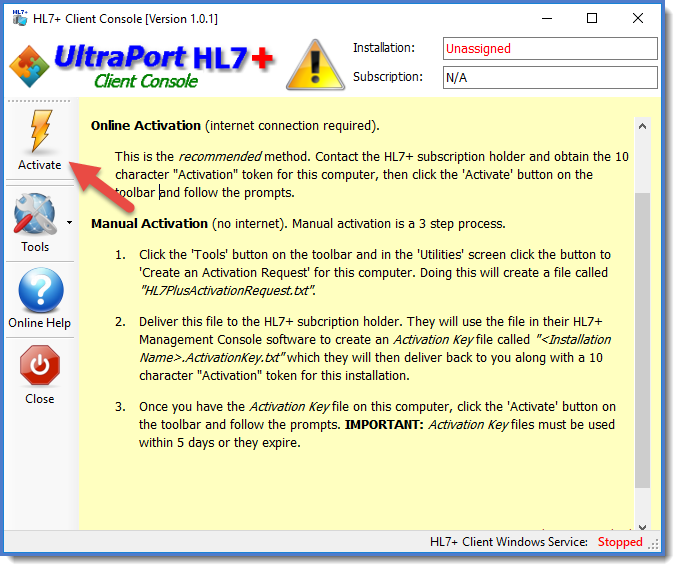 Click Activate Button
In the Activation Window check the box to indicate that I have a manual activation key file.
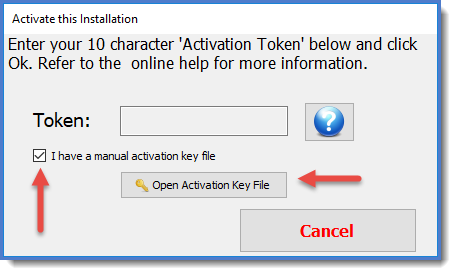 Activate with Key File
Click the Open Activation Key File button and you will be done.
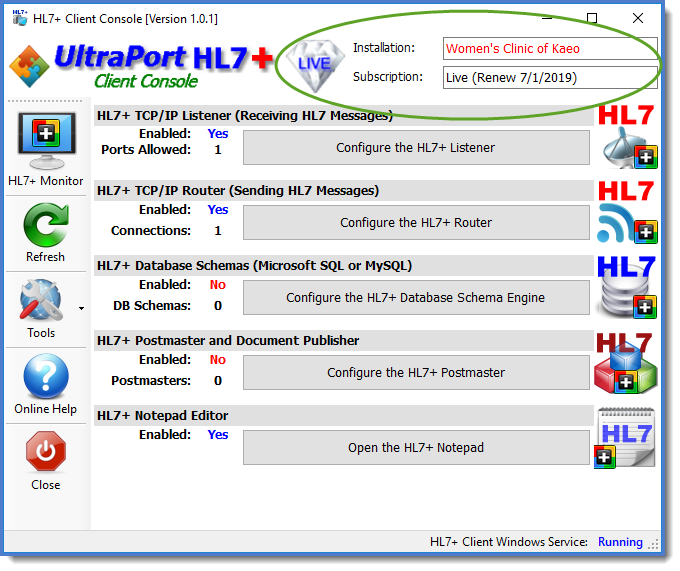 The Activated Installation
|
You will have to manually update an installation at least once every year after you renew your HL7+ subscription, and also if you make any changes to the installation (like upgrades, or renaming it etc). A manual update, like manual activation requires 3 steps.
1.In the HL7+ Client Console you will create a Manual Activation Request file and deliver it to a computer running the HL7+ Management Console 2.In the Management Console you will use that file in the Installation Options window to create a Manual Update Key file and deliver that file back to the client. 3.In the Client Console you will use the Update Key File to apply the updates to the installation.
STEP 1. Creating the Manual Update Request
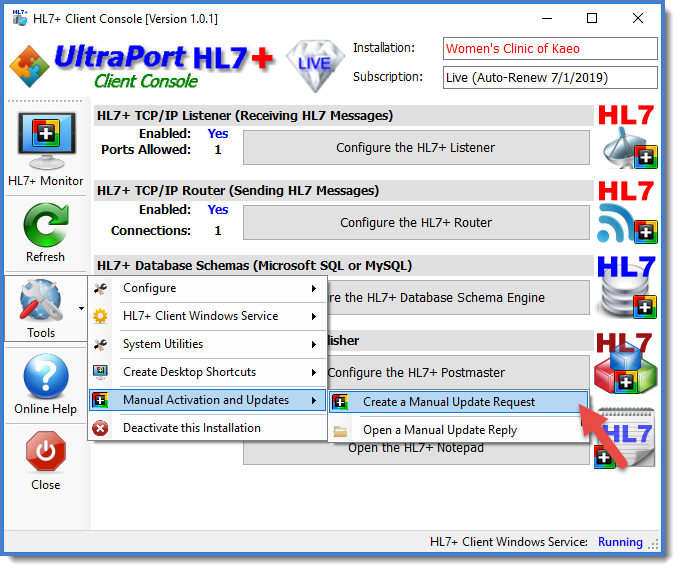 Creating a Manual Update Request
In the Client Console software click the Tools button and in the Manual Activation and Updates menu click Create a Manual Updte Request. You will be prompted to select the folder and it will create a file called <installation name>.UpdateRequest.txt. Deliver this file to a computer running the Management Console software.
STEP 2. Creating the Manual Update Key File
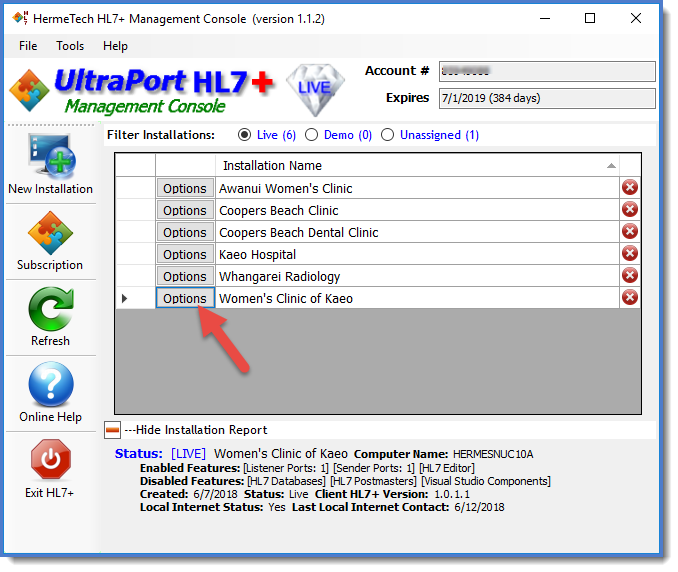
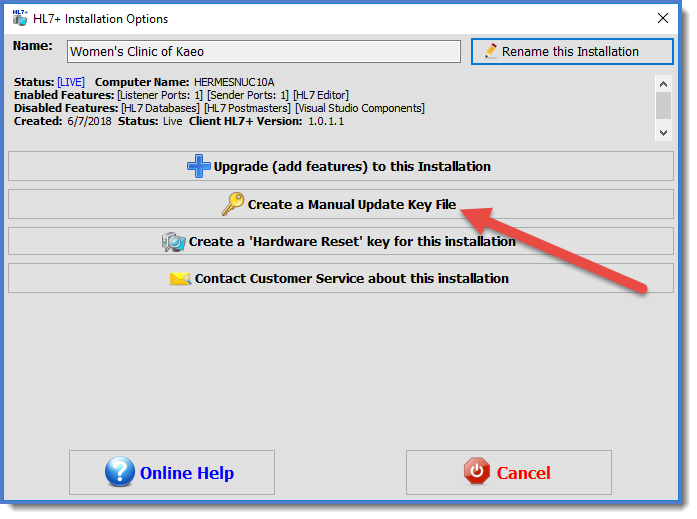
In the Management Console (installations view) click the Options button for the installation. You will be prompted to open the update request file created in Step 1. It will create the update key file which you must now deliver back to the client computer for Step 3.
STEP 3. Applying the Updates
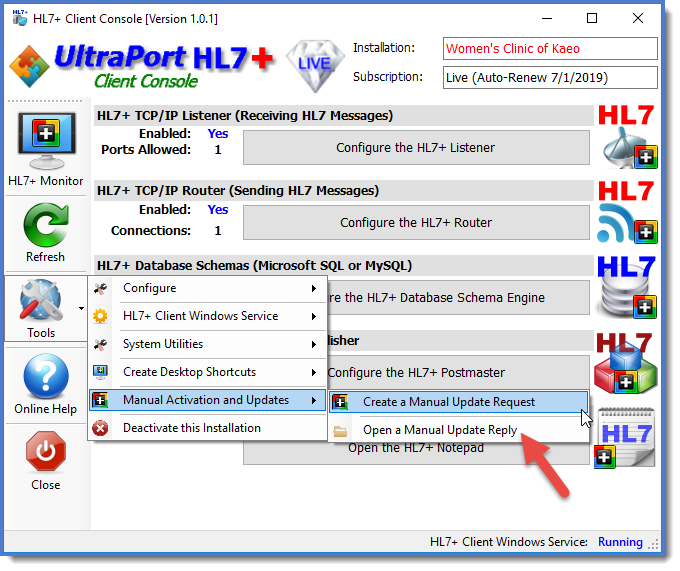 Click Open a Manual Update Reply
In the HL7+ Client Console click Open a Manual Update Reply, follow the prompts and the updates will be applied to your installation.
|
|
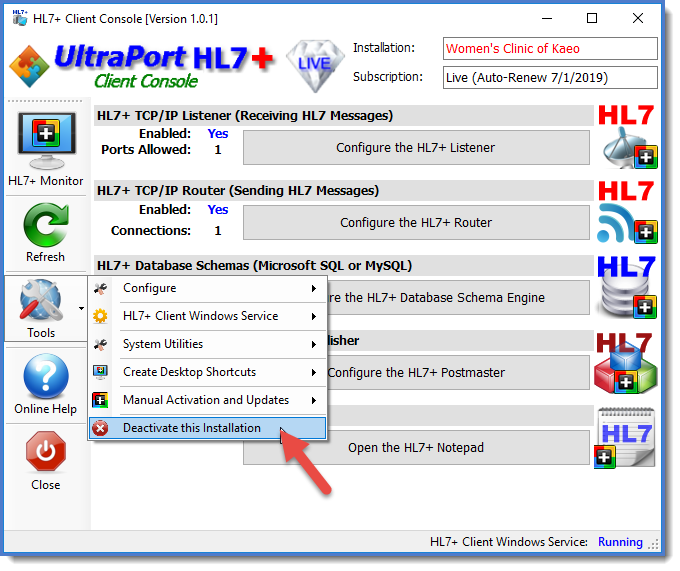
For installations that are internet capable deactivating or deleting a HL7+ installation is easy. For those without internet access you will have to go through the manual process. In the Tools menu of the client console click Deactivate this Installation and follow the prompts. It will create a Purge Data File which you must then deliver to a computer running the Management Console. See Purge Data Files for more information.
IMPORTANT: If possible you should always go through this step in the client console software before actually uninstalling the software in Add/Remove Programs in Windows.
|

