Creating Proxy Applications
*All screenshots are from the UltraPort HL7 Postmaster
The UltraPort HL7 Postmaster software comes with a simple application which demonstrates how a Proxy application works. It demonstrates both how to use a Proxy application to SEND HL7 messages to an HL7 Postmaster "Proxy" Data Source as well as how to RECEIVE HL7 messages from an HL7 Postmaster "Proxy" Destination.
It's really a very simple application, it was written in MS Visual Studio 2010 in less than 8 hours by a novice programmer 2 years out of University working in the HermeTech International. The full source code for this application is freely available to our customers.
Proxy Applications are created using the UltraPort HL7 Postmaster Proxy API which is a MS Visual Studio Class Library DLL available (as of the time of this writing) for the Microsoft .Net Framework versions 2.0, 3.5 and 4.0. This API is also freely available to our customers.
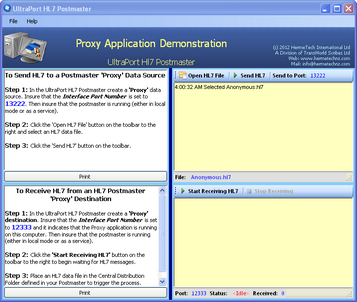
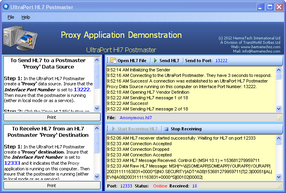
You can launch the Proxy Demonstration program from the Tools menu of the main window. The Proxy Demo application is well documented from within the program itself as you can see from the screen-shot below.
One of the first things you notice in the Proxy Demo Application is that for both functions (Sending HL7 and Receiving HL7) you have to first configure an HL7 Postmaster to interact with it by creating either a Proxy Data Source or a Proxy Destination. Here's a step by step guide to creating a "Closed Loop" HL7 Postmaster which will work with the Proxy Demo Application for both Sending and Receiving HL7.
Since the result is a "Closed Loop", it means that All HL7 messages are in fact consumed without leaving any traces on the file system except for entries in the Postmasters traffic logs.
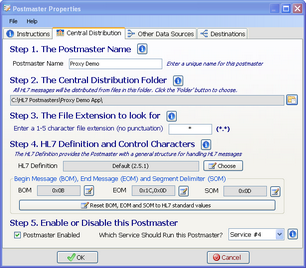
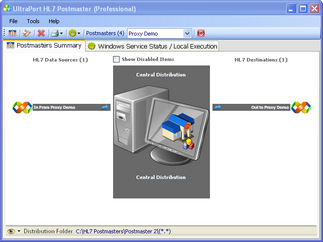
Step 1. In the UltraPort HL7 Postmaster create a new Postmaster named Proxy Demo using a new unused folder as the Central Distribution Folder. When completed the Central Distribution tab should look something like the screen-shot below:
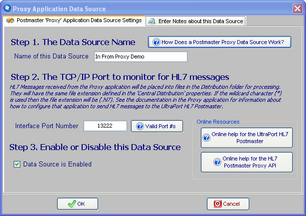
Step 2. In the Proxy Demo postmaster create a Proxy Data Source (see Proxy Data Sources) named In From Proxy Demo. Make sure that in the data source the Interface Port Number field is set to 13222. When completed the Data Source properties should look something like the screen-shot below:
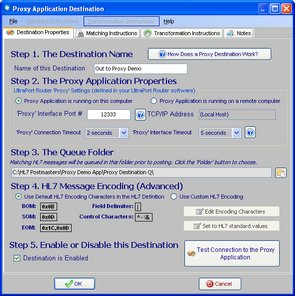
Step 3. In the Proxy Demo postmaster create a Proxy Destination (see Proxy Destinations) named Out to Proxy Demo. Make sure that in the destination properties the Interface Port Number field is set to 12333. and the checkbox is checked that indicates that the Proxy Application is running on this computer. Use a new unused folder as the Queue Folder. No Matching Instructions or Transformation Instructions are necessary. When completed the Data Source properties should look something like the screen-shot below:
Step 4. You are now ready to run! Make sure that you save your Proxy Demo postmaster by clicking
Step 5. Start the Proxy Demo Application (if you haven't already) from the Tools menu in the main window.
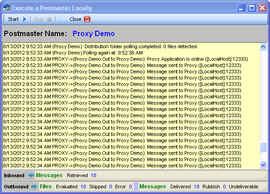
Step 6. Start the Postmaster running in a local window (see Running Locally).
Step 7. In the Proxy Demo Application follow the instructions to start receiving HL7 messages and THEN select an HL7 data file and start sending HL7 messages into your Proxy Application Data Source you created in Step 2.
|
When Running side-by-side on your desktop your Proxy demonstration will look something like the screen-shots below.
See Also: Proxy Application Destinations, Proxy Application Data Sources

